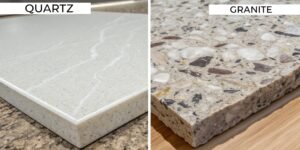
Hating that ugly line in your beautiful quartz? A bad seam can ruin the entire look. Filling it correctly requires a specific process, not just glue, to make it disappear.
To fill a quartz seam, installers clean the slab edges with denatured alcohol1, apply a custom color-matched two-part epoxy2, and use a seam setter to pull the pieces tightly together. Once the epoxy is partially cured, they shave the excess flush with the surface for a nearly invisible join.

The difference between a good seam and a bad one is huge. I remember a project with a new office headquarters in Dubai where this exact issue came up. They ordered hundreds of our pure white slabs, and the look had to be perfect. Their first attempts were terrible, with visible grey lines ruining the surface. A few simple changes in their process made all the difference. The quality of a seam is where the skill of the installer truly shines. Let me walk you through how the pros do it, so you know what to look for.
How do you hide seams in quartz countertops?
Is a visible seam ruining your quartz countertop's flow? This ugly line can cheapen the entire installation. The secret to hiding it lies in careful preparation and meticulous color matching.
You hide quartz seams by planning slab layout to place them in less visible areas. Installers then use painter's tape to protect the surface and clean the edges with denatured alcohol1. This prevents discoloration and ensures the color-matched filler bonds perfectly, making the seam blend in.

Let me tell you what my lead technician, Mr. Chen, saw on the video call with the Dubai team. They were skipping the most basic step: preparation. To create an invisible seam, you must start with a perfectly clean surface. You wipe the edges of both slabs with denatured alcohol to remove any cutting dust or oils from handling. The team in Dubai wasn't doing this, so dust was mixing into their adhesive, making the seam look dirty and grey. You also must protect the top surface by laying painter's tape along both sides of the seam. This prevents any excess glue from staining the quartz, making cleanup much easier and sharper. It's a simple step, but without it, you can't get a clean, hidden seam.
| Seam Preparation | Clean Edges (Correct) | Dirty Edges (Incorrect) |
|---|---|---|
| Adhesive Bond | Strong, clean adhesion | Weak bond, potential for failure |
| Seam Color | Pure, matches the intended color | Discolored, greyish, dirty appearance |
| Final Look | Blends into the countertop | Stands out as a visible line |
How do you physically join and fill the seam?
Your seam is still wide or uneven, even with the right glue? This sloppy gap looks bad and collects grime. The solution is using a professional tool called a seam setter.
Professionals fill the seam by applying the color-matched epoxy and then using a seam setter. This powerful tool uses suction cups to pull the slabs together, creating a hair-thin join. It also precisely levels the two surfaces, ensuring the final seam is completely smooth and flush.

After preparation, the real artistry begins. This involves two key stages: joining and finishing. First, the installer applies the colored adhesive into the clean gap. Then, they use a professional tool called a seam setter. This tool has large suction cups that grip the slabs on both sides of the seam. By turning its knobs, it pulls the two heavy slabs together with incredible force, making the gap super tight. It also has leveling knobs to ensure the two surfaces are perfectly flush, with no ridge. The Dubai team wasn't using one, which is why their seams were uneven. The final touch is the most delicate. After the adhesive cures to a gel-like state—not rock hard—the installer takes a new razor blade held almost flat and carefully shaves off the excess. This leaves a perfectly smooth and filled seam.
The Professional Seam-Filling Process
- Apply Adhesive: Mix the color-matched epoxy and apply it into the clean seam gap.
- Set the Tool: Place the seam setter across the joint and activate the suction cups.
- Pull and Level: Tighten the tool to pull the slabs together and adjust the knobs to make the surfaces perfectly level.
- Cure: Allow the adhesive to partially cure to a gel-like consistency.
- Shave: Carefully shave the excess adhesive off with a sharp razor blade.
What is the best filler for quartz countertops?
Choosing the wrong filler can lead to a weak, stained, or discolored seam. This can ruin your expensive countertop. The best choice is a specialized two-part polyester or epoxy adhesive.
The best filler is a specialized two-part polyester or epoxy adhesive designed for stone. These adhesives offer superior strength and, most importantly, can be precisely color-matched with pigments. This ensures a durable bond and a seam that blends perfectly with the countertop color and pattern.

This was the second major problem with the Dubai installation. They were using a generic, all-purpose grey adhesive. On our pure white quartz slabs, it stood out and looked terrible. You cannot use just any glue. Professionals use specific two-part adhesives made for stone. The most common is polyester-based, which cures relatively quickly and is excellent for color matching. Epoxy-based adhesives offer an even stronger bond and more water resistance. The most critical feature for both is their ability to be tinted. For our popular designs, we provide fabricators with exact color formulas. For a solid color slab, you start with a white or translucent base and add tiny drops of pigment until the color is a perfect match. A good installer takes the time to get this right, as it is essential for making the seam disappear.
| Filler Type | Main Use | Color Matching | Strength |
|---|---|---|---|
| Polyester Adhesive | Industry standard for stone seams | Excellent, easy to tint | Very Strong |
| Epoxy Adhesive | High-strength, water-resistant seams | Good, can be tinted | Exceptionally Strong |
| Silicone Caulk | Never use for seams. Only for edges | Poor for seams | Flexible, not a bond |
How to make quartz countertops seamless?
You dream of a single, continuous slab of quartz, but seams are often necessary. A sloppy seam can break this illusion. A truly seamless look combines every professional technique perfectly.
Achieving a seamless look is about making the seam virtually disappear. This is done by planning the seam's location wisely, ensuring cabinets are perfectly level, and hiring a skilled installer who executes every step: proper cleaning, precise color-matching, mechanical seam setting3, and careful final shaving.

A truly seamless appearance is the final goal. It represents the pinnacle of countertop fabrication and installation. It is not just one thing, but the result of the entire process done correctly. It actually starts before the installation, during the slab layout phase. A good fabricator will plan to place seams in the least conspicuous places, like under a cabinet rail or in a corner. For slabs with veining, they will try to match the pattern across the seam. Then, the foundation must be perfect—the cabinets have to be completely level, as we've discussed before. You can't level a seam on an unlevel base. Finally, it comes down to the installer’s skill in performing the four critical steps: Clean, Color-Match, Clamp, and Shave. A seamless look is not something you can DIY. It is the signature of a true craftsman.
Checklist for a Seamless Appearance
- Strategic seam placement during fabrication.
- Perfectly level and stable cabinets.
- Thoroughly cleaned slab edges using denatured alcohol1.
- Precise color-matching of the two-part adhesive.
- Use of a professional seam setter to pull and level.
- Expert shaving of excess adhesive at the correct curing stage.
Conclusion
Filling a quartz seam is a skilled craft, not just a simple gluing task. It requires the right materials, tools, and a patient process to achieve a truly invisible, durable result.